Ascent Plates(深雪爬升板)适用于大雪后开线、陡坡粉雪沟、雪山山脊线爬升或是滑梯峰等情况。
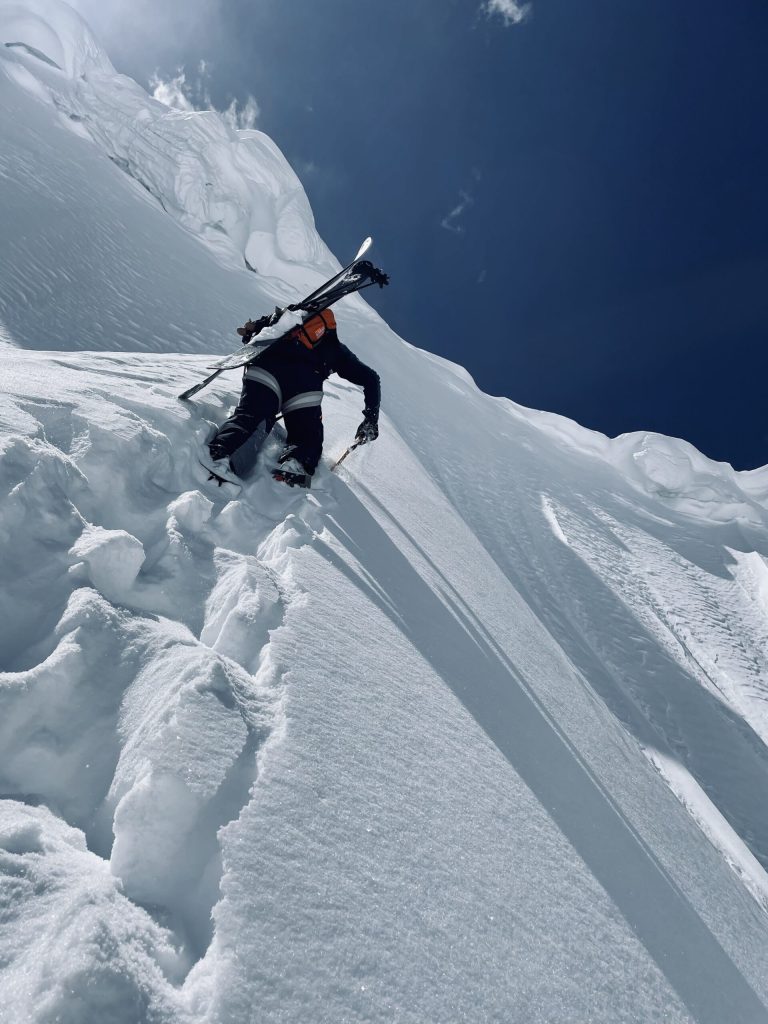
之前刷 Nikolai Schirmer 视频被种草的了Ascent Plates(深雪爬升板)。陡坡深粉雪的时候,普通鞋一踩就直接陷到大腿根,太费体力了。那种大脚板雪鞋也不适用于陡坡,国外大神的解法一般都是夹一块这个板子,增加受力面积提供浮力,直接在雪上“水上漂”。爬雪山,或者去滑深粉都可以带上救急。
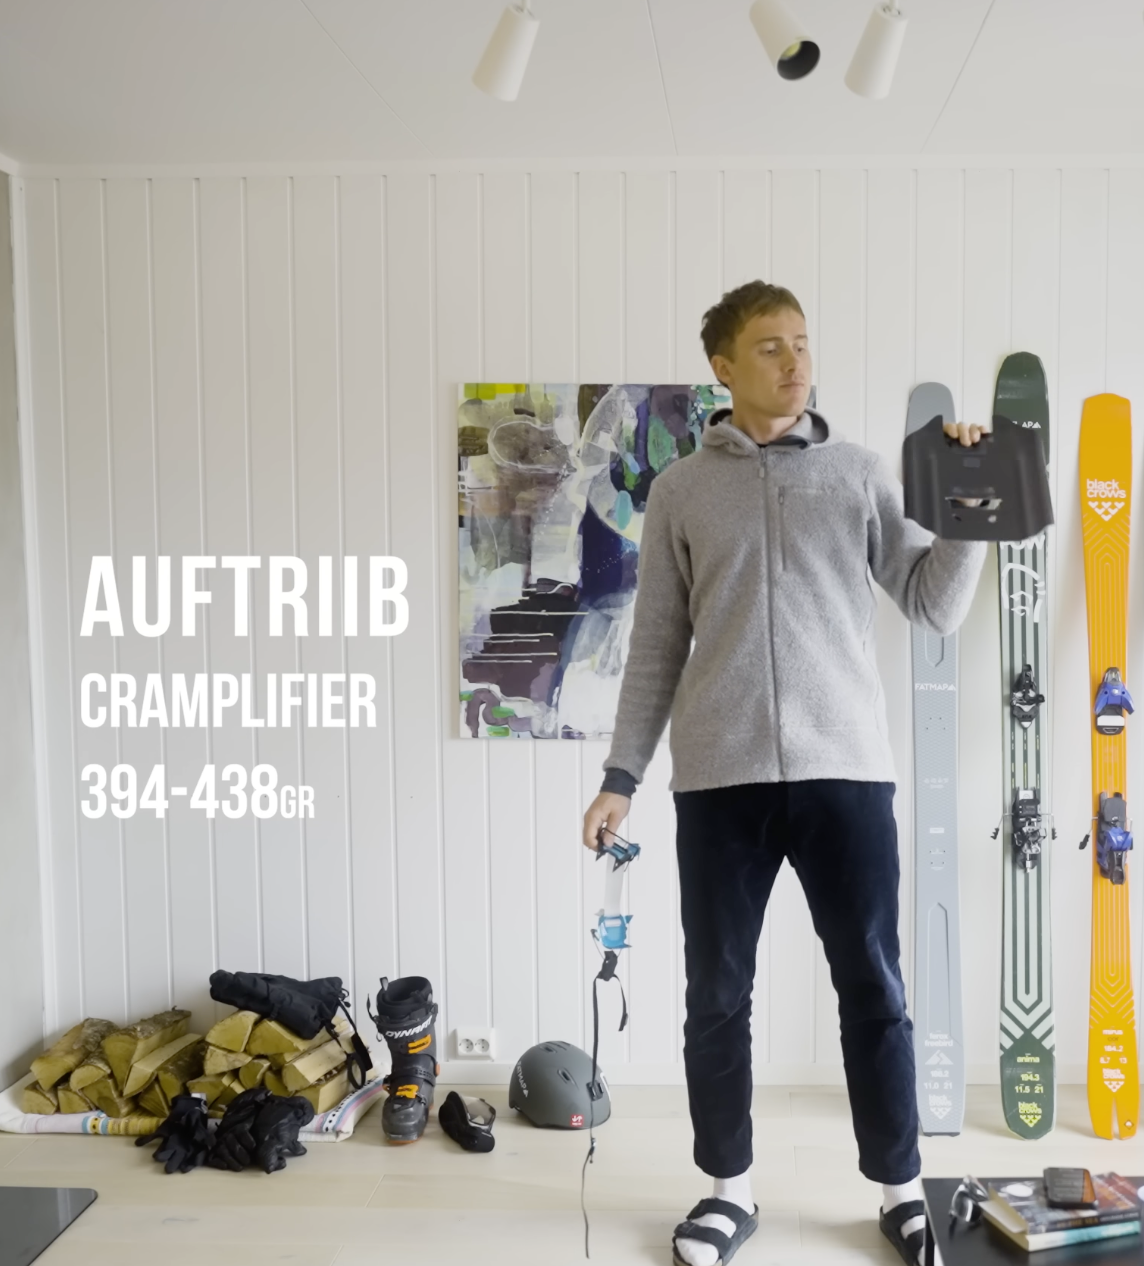
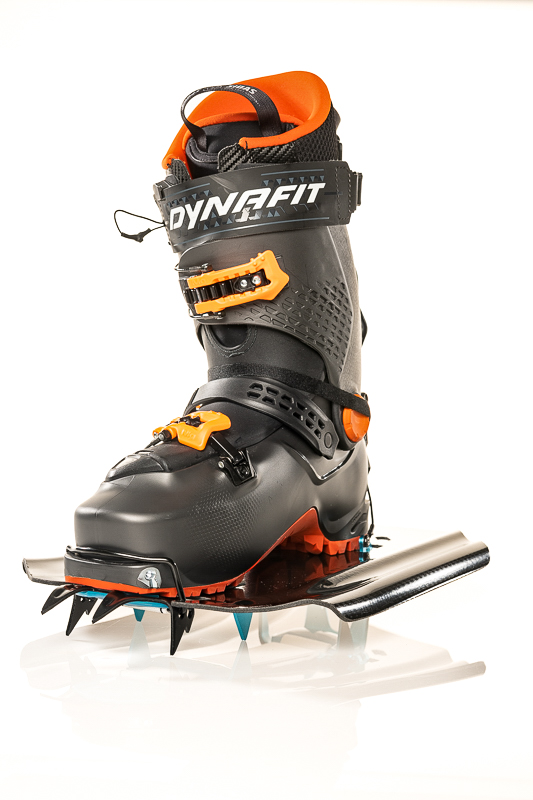
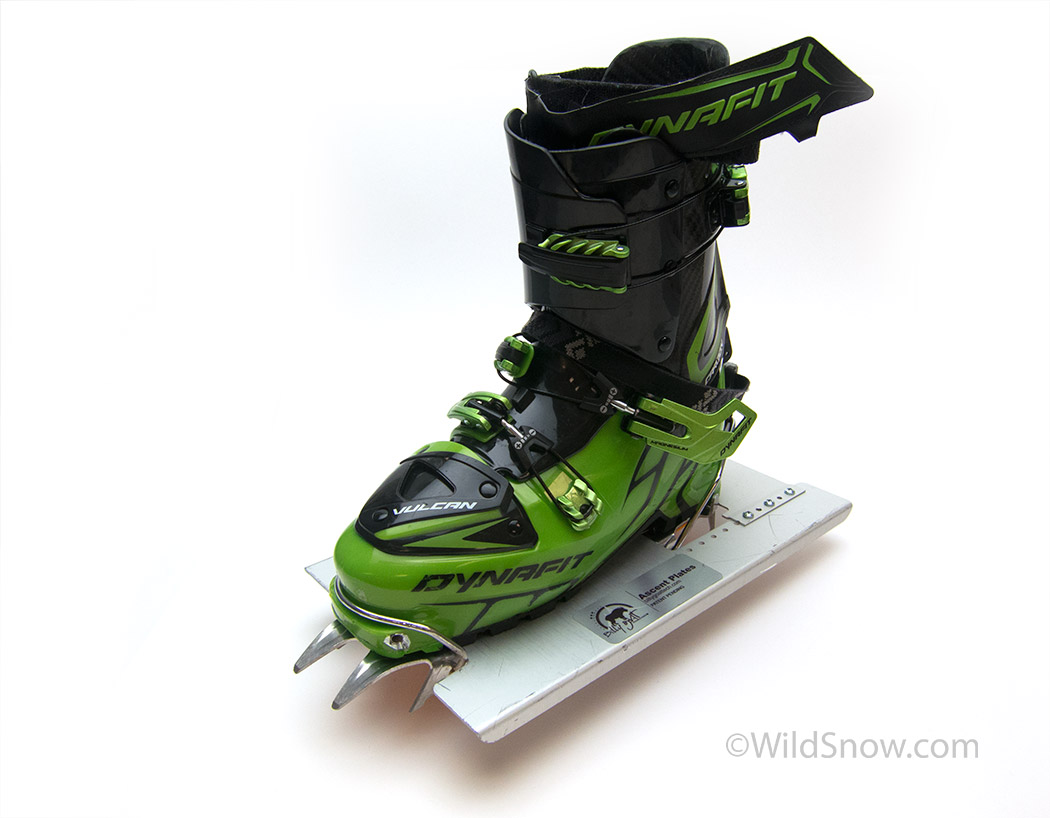
不过外网的成品和DIY基本都是硬鞋/专业登山鞋 + 全卡式钢爪的硬核玩家,DIY的方案也多是这个方向。我(多数时间)作为一个单板软鞋党,加上想要轻量化好携带,就参考了 Billy Goat 、Auftriib 和其他人DIY作品的设计,自己画图改了一版,出了个软鞋的。
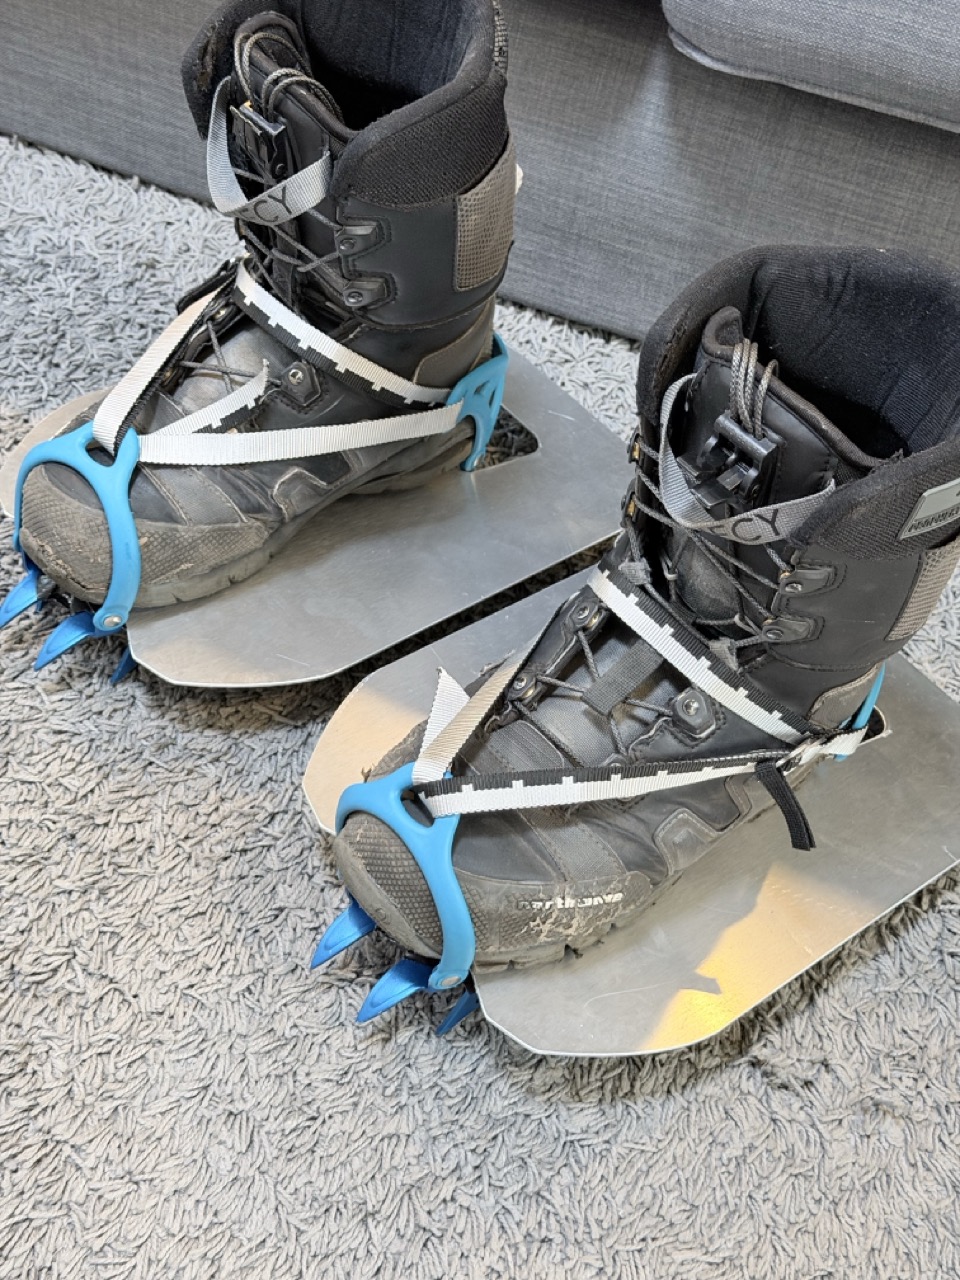
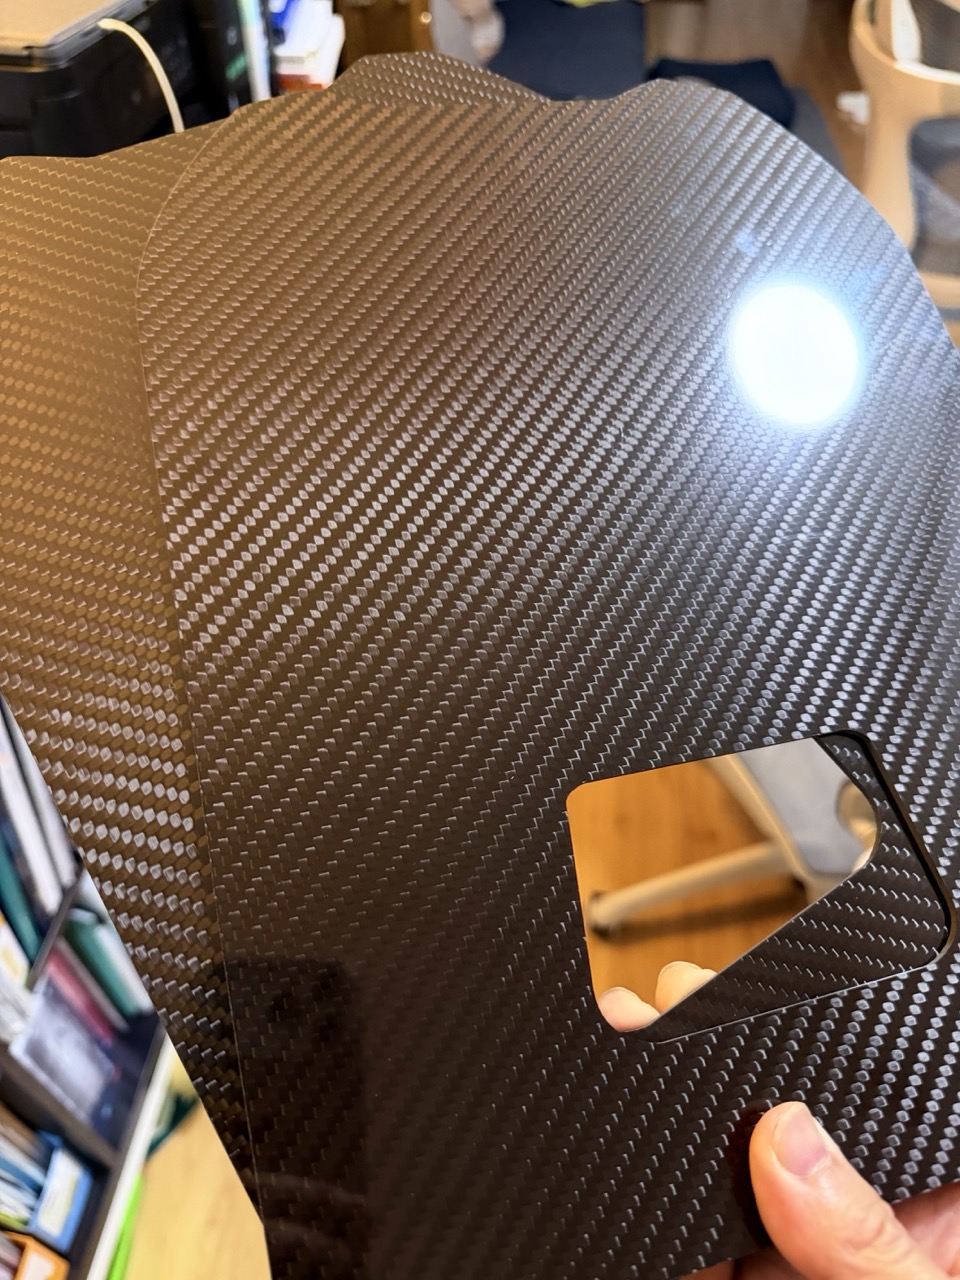
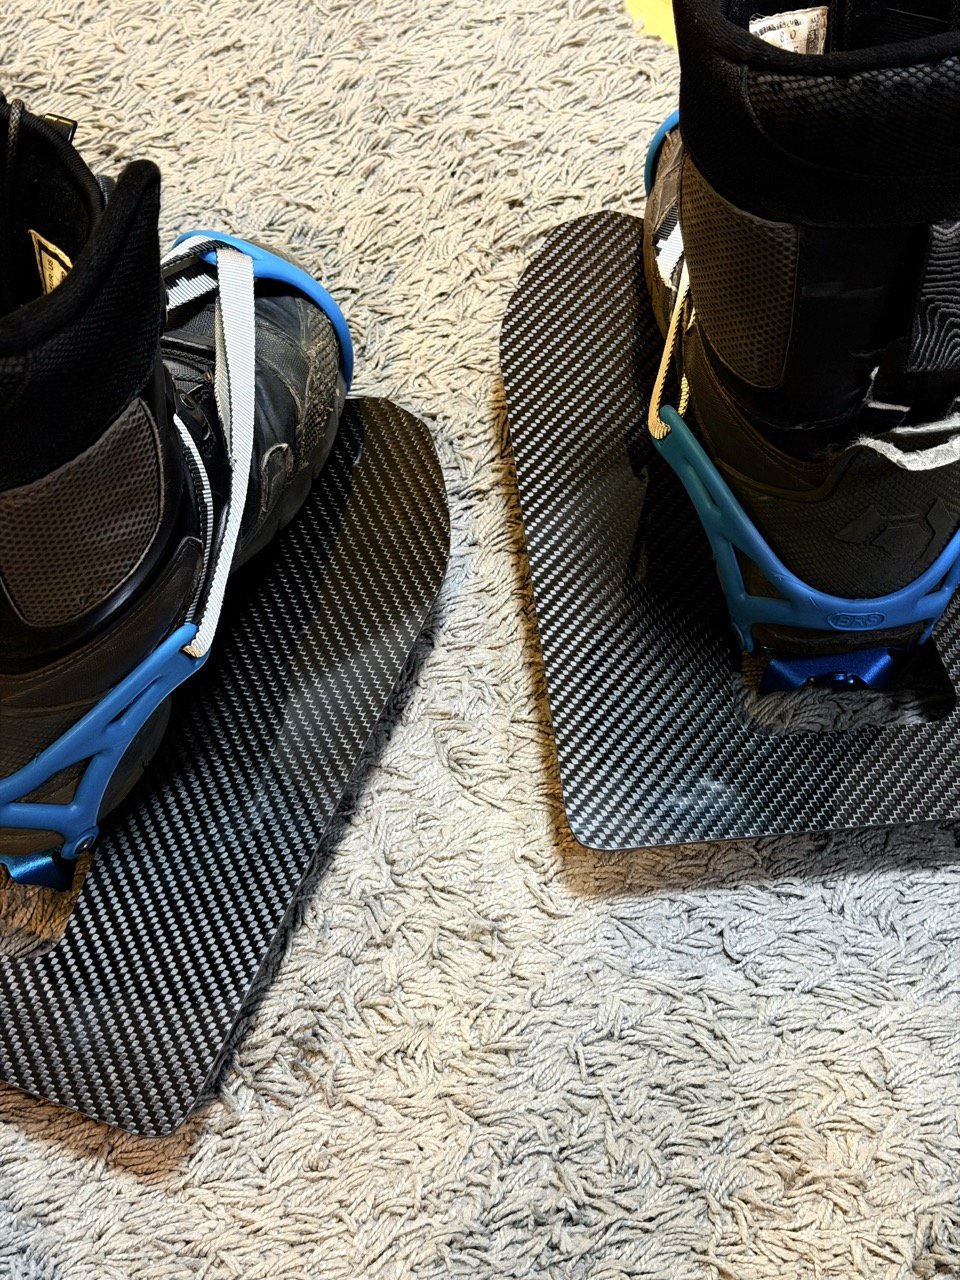
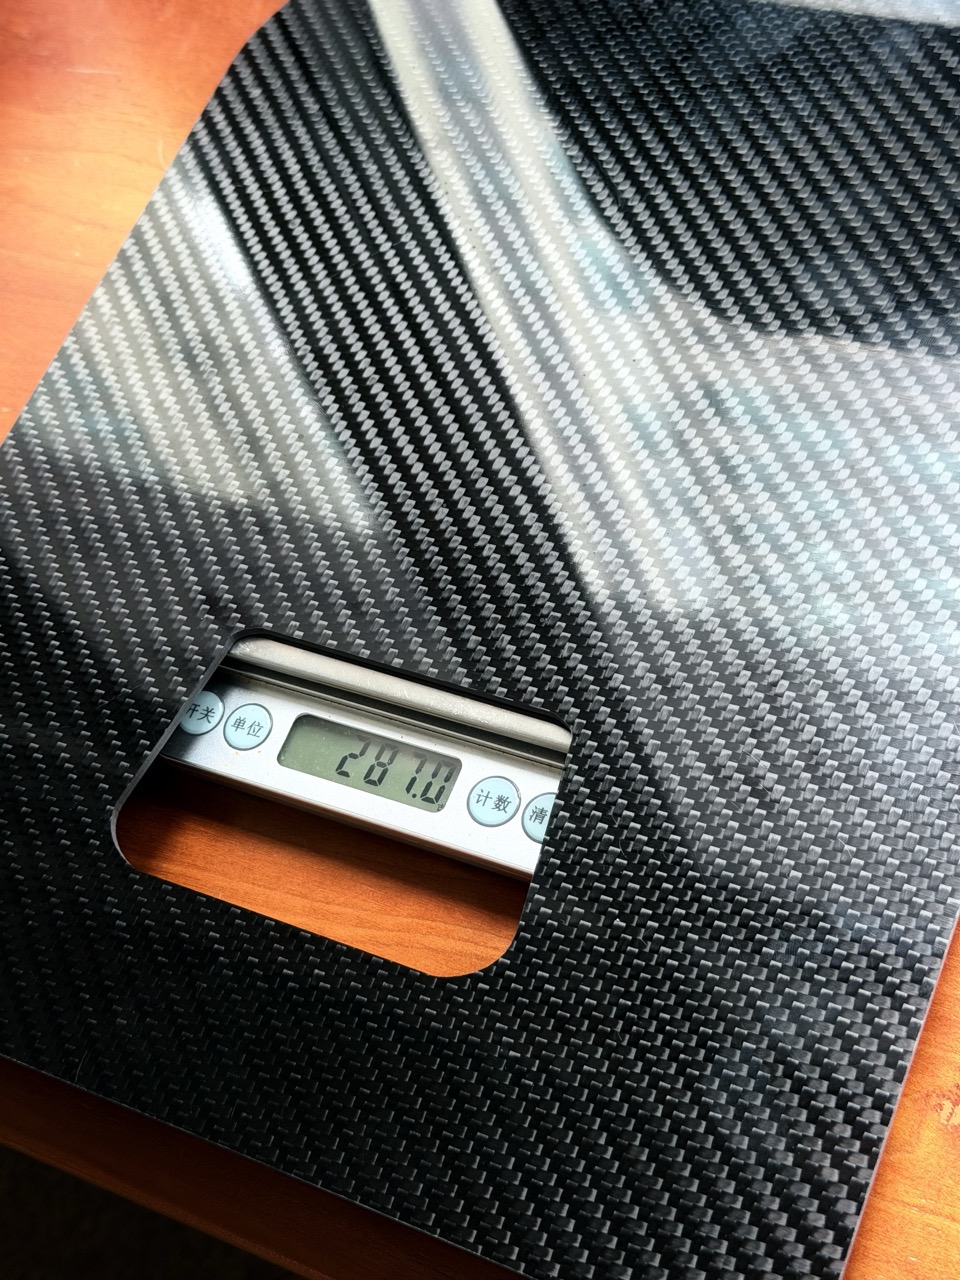
铝合金版用 2mm 厚的 6061 铝合金激光切割,我穿的雪鞋260码,在这个鞋长下,铝合金版本单块 395 克。碳纤维版用的是东丽3K碳纤维斜纹亮面2.5mm的,而不同于6061铝合金,亮面碳纤维板不粘雪,是一大优势。碳纤维版本单片280克,比铝版本的轻了一百多克,还厚了0.5mm,粗略试了下感觉韧性和强度应该都大于铝合金版本。
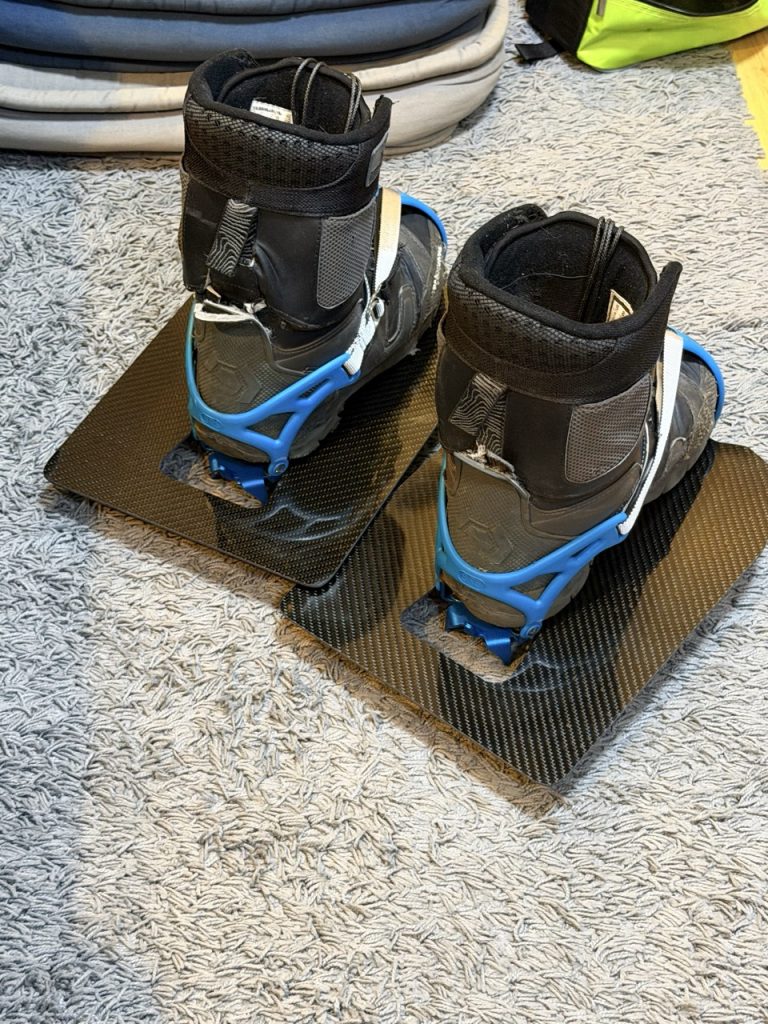
我穿的雪鞋260码,在这个鞋长下,尺寸是 245x338mm,这个面积的浮力在深雪里应该够了。不做边缘折弯是看到国外DIY的大神说其实深雪意义不大,6061/7075铝合金折弯容易崩,碳纤维板又难以加工。(Auftriib的板子只是看起来像碳纤维,但其实是塑料+碳纤维外观)
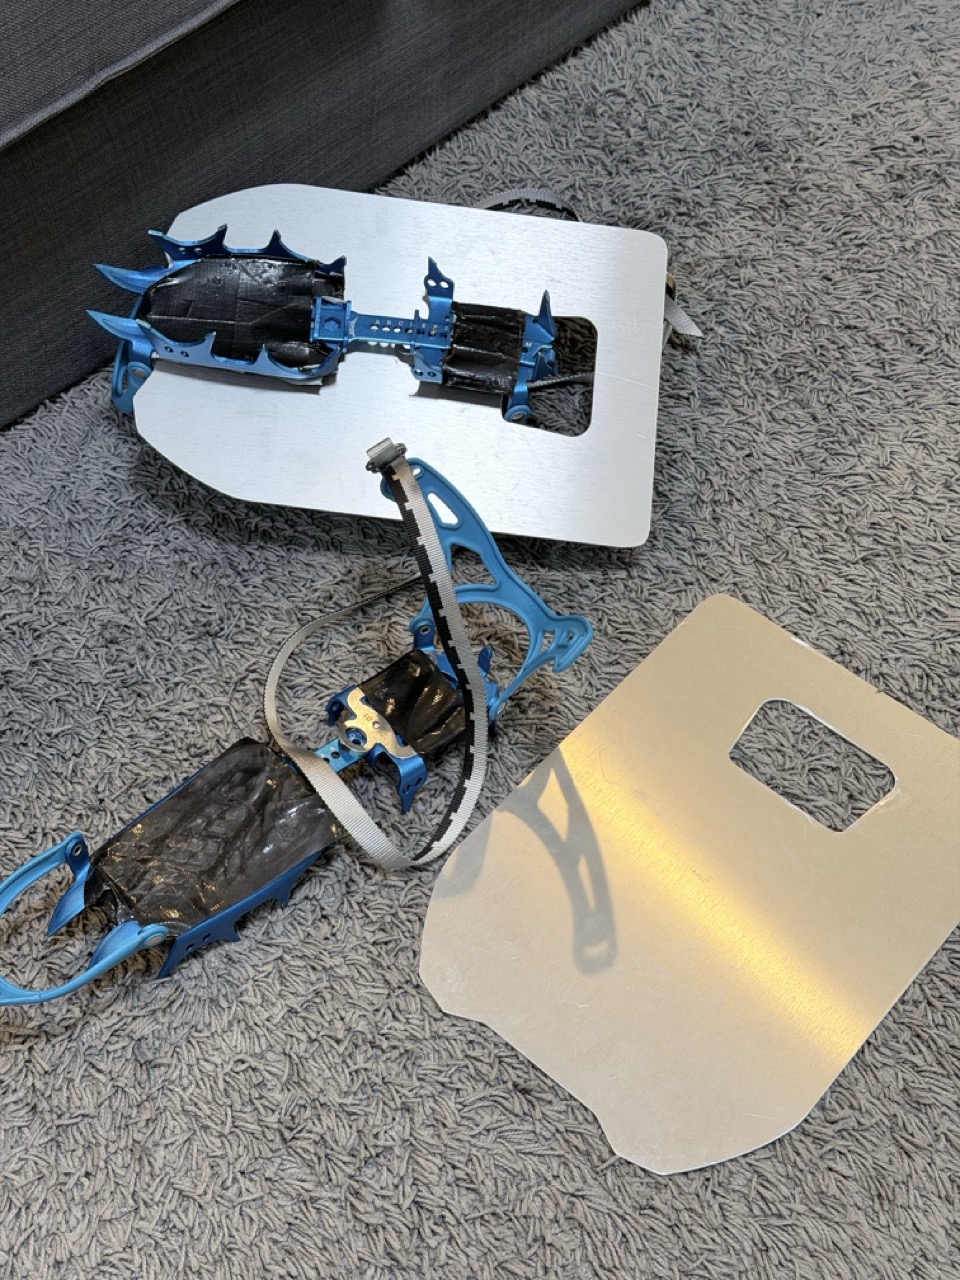
我是用单板软鞋 + BRS 铝合金冰爪。适用于兄弟冰爪BRS铝合金版本,这个冰爪爬雪坡够了,价格便宜内国外也都有卖的。我目前没有其他冰爪所以暂时只有适用它的。不用钢爪是因为铝爪确实轻,平时塞包里不重。这个爪没有防粘雪的底板,我还自己用塑料片和胶布做了个防雪板,实测很管用。
安装逻辑上,这块铝板是卡在雪鞋和冰爪中间的。之前还纠结要不要像 Auftriib 那样单独多绑一根 Voile 绑带固定,后来想想在山上多搞一个步骤纯属冻手,可以在鞋底那面贴上带背胶的硅胶防滑垫。只要把冰爪的绑带一拉,靠夹紧力和摩擦力就彻底锁死了,冰爪的抓雪深度也完全没有损失。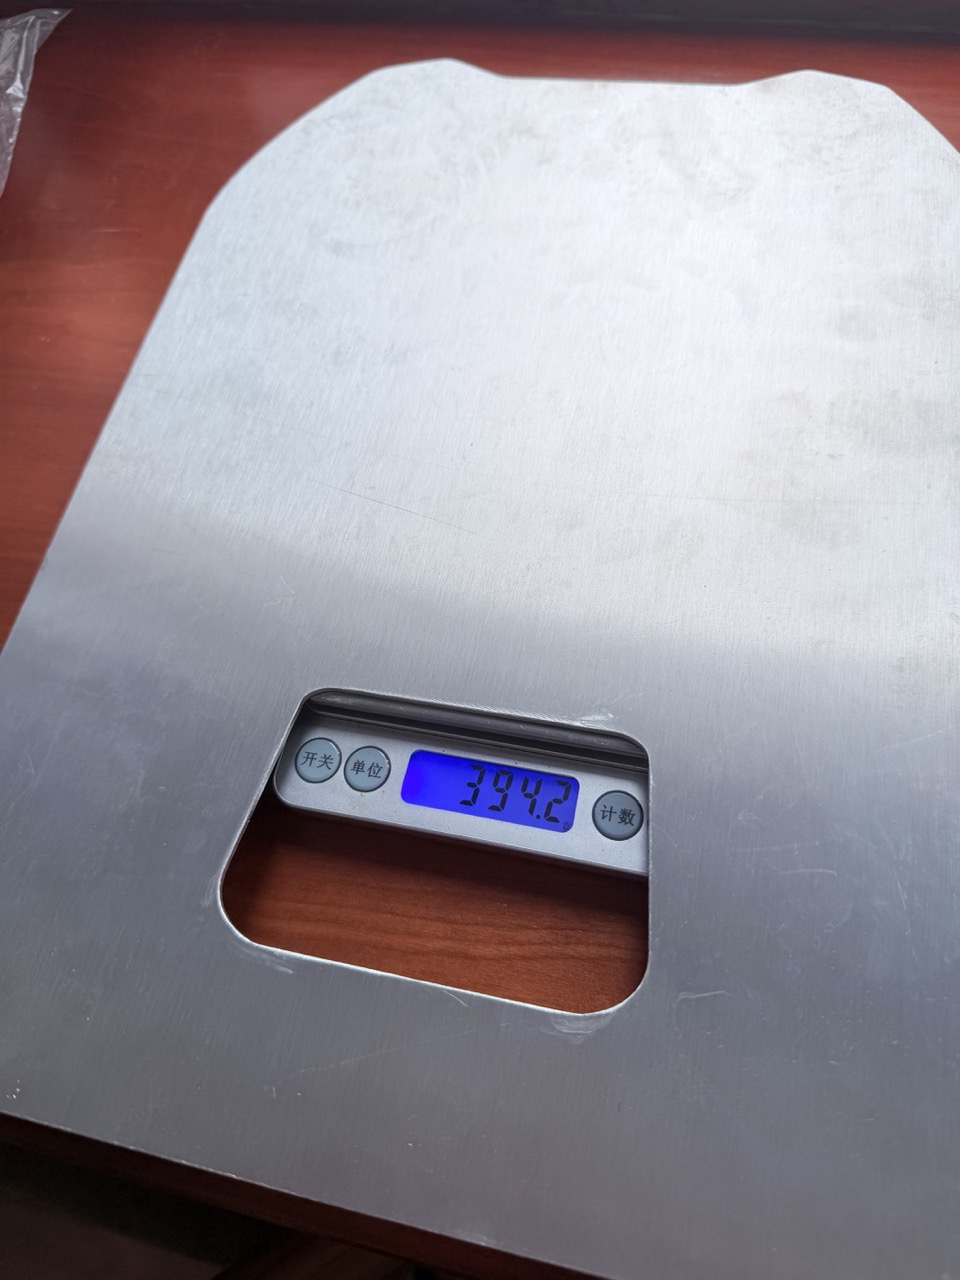
需要模型的朋友可以点文章末尾的附件下载dxf文件,网上很多可以做碳纤维板和铝合金的,大家发他们dxf文件即可。我的鞋码在中国厂家做出来价格分别是铝合金不到两百块人民币、碳纤维板两百多人民币。
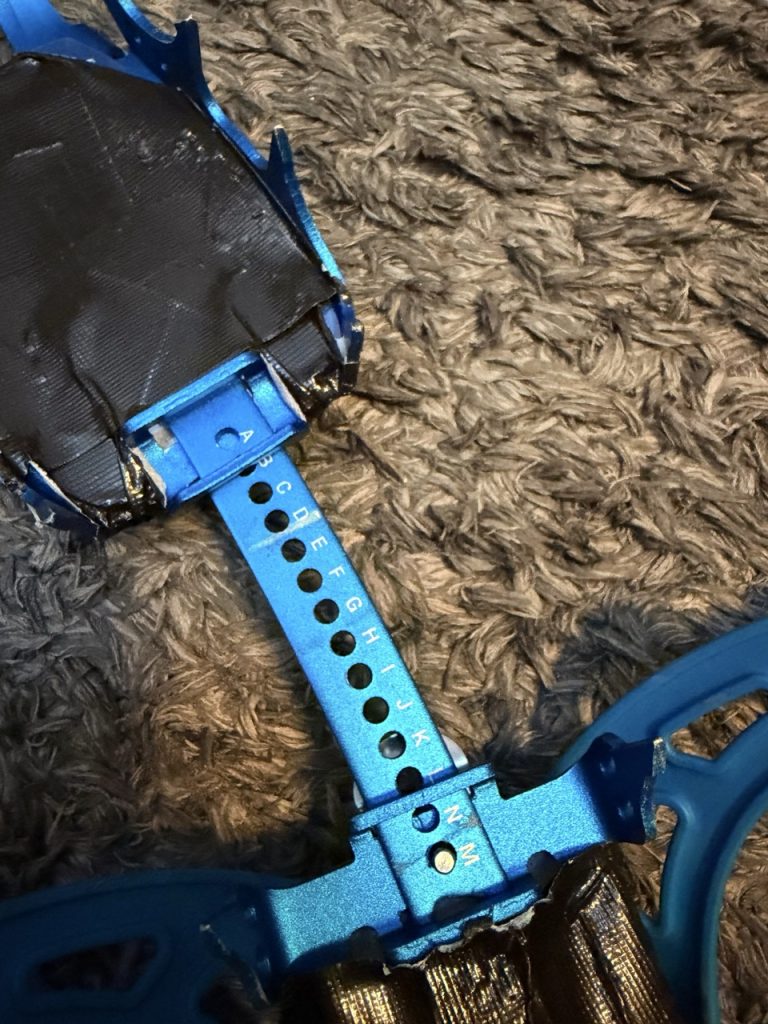
最后要注意的是大码脚的朋友,我不知道是不是BRS的糊涂了闹了乌龙还是有什么特别讲究,如最后一张图,LMN码写成了LNM,不清楚是不是我这个的特例,但模型文件里还是按正常顺序排的,请注意辨别清楚再打印。
大家滑雪顺利~!
DIY Lightweight Ascent Plates for Snowboard Softboots & BRS Aluminum Crampons (DXF Files Included)
Ascent Plates are a total game-changer for breaking trail in deep snow, skinning up steep powder couloirs, climbing exposed alpine ridges, or tackling technical peaks like Chutes.
I first got hooked on the idea of Ascent Plates after watching Nikolai Schirmer’s videos. When you hit steep, waist-deep powder, hiking in regular boots is an absolute nightmare—you just sink to your thighs and burn all your energy. Snowshoes don’t really cut it on steep terrain either. The go-to solution used by pro riders overseas is to sandwich a set of these plates under their crampons to expand the surface area, providing insane floatation so you can basically “walk on water” (or rather, snow). They are perfect as a backcountry safety net or for deep powder bootpacks.
However, almost all commercial options and DIY designs online are tailored for hardbooters or mountaineering pros using full-automatic steel crampons. As a snowboard softboot rider (most of the time) who wants to keep things light and packable, I took inspiration from Billy Goat Technologies, Auftriib, and various DIY builds online to sketch out and modify a version specifically for softboots.
Material & Specs Comparison:
- Aluminum Version: Cut from 2mm 6061-T6 aluminum via laser cutting. My boot size is Mondo 260. For this specific boot length, a single aluminum plate weighs 395 grams.
- Carbon Fiber Version: Cut from 2.5mm Toray 3K twill glossy carbon fiber. Unlike the 6061 aluminum, the glossy carbon fiber surface prevents snow from sticking (anti-balling), which is a huge plus. A single carbon plate weighs only 280 grams—saving over 100 grams while being 0.5mm thicker! A quick bench test shows its toughness and rigidity easily outperform the aluminum version.
For my Mondo 260 boots, the overall dimensions are 245x338mm. This surface area provides plenty of floatation in deep snow. I skipped the folded/bent edges because many seasoned DIYers online mentioned it doesn’t make a big difference in deep powder. Plus, bending 6061/7075 aluminum can easily crack the material, and carbon fiber is notoriously difficult to shape. (Fun fact: Auftriib plates only look like carbon fiber, but they are actually a plastic-carbon composite).
The Setup:
I use this setup with snowboard softboots + BRS aluminum crampons. It’s customized perfectly for the aluminum version of Brother BRS crampons, which are cheap, widely available worldwide, and more than enough for snow slopes. Since I don’t own other crampons right now, the current file is strictly compatible with this model. I chose aluminum over steel crampons purely for weight savings—they sit in my pack without feeling like a brick. Since these crampons don’t come with anti-balling plates, I DIYed my own snow-shedding sheets using plastic tabs and duct tape. It works like a charm.
Mounting Logic:
The plate is sandwiched directly between the boot sole and the crampon frame. At first, I debated whether to add an extra Voile Strap to lock it down separately like Auftriib does. But honestly, messing around with another strap on a freezing ridge just means freezing your fingers off. Instead, I decided to apply a self-adhesive silicone anti-slip pad on the side touching the boot sole. Once you pull and tension the crampon straps, the sheer clamping force combined with the silicone friction locks everything dead in place. Best of all, you lose absolutely zero crampon spike depth.
How to Make Your Own:
If you want to build this, feel free to download the .dxf files attached at the end of this post. There are plenty of online CNC/laser cutting vendors that handle carbon fiber and aluminum—just send them the file. For reference, based on my boot size, the manufacturing cost here in China was under $30 USD (approx. 200 RMB) for aluminum, and around $40 USD (approx. 200+ RMB) for carbon fiber.
One final heads-up for riders with bigger boot sizes:
I’m not sure if BRS made a typo or if there’s some weird convention, but as shown in the last picture, the size labeling on the crampon bar goes L-M-N, but it’s written as L-N-M. I’m not sure if this is just a fluke on my specific pair, but I fixed it to the correct logical sequence in the CAD file. Just double-check your crampon adjustments before you print or cut.
Enjoy the build and stay safe out there!